ดาวน์โหลด LUT ฟรี สำหรับ Davinci Resolve และใช้สำหรับการตัดต่อวิดีโอระดับมืออาชีพ จะได้รับ Davinci Resolve LUT ฟรี มากกว่า 100 รายการ
วิธีการติดตั้งและใช้งาน
โหลดโปรแกรม DaVinci Resolve https://www.blackmagicdesign.com/products/davinciresolve
ไฟล์วิดีโอสำหรับทดสอบ https://filmplusgear.com/sony-fx6-test-files-for-download/
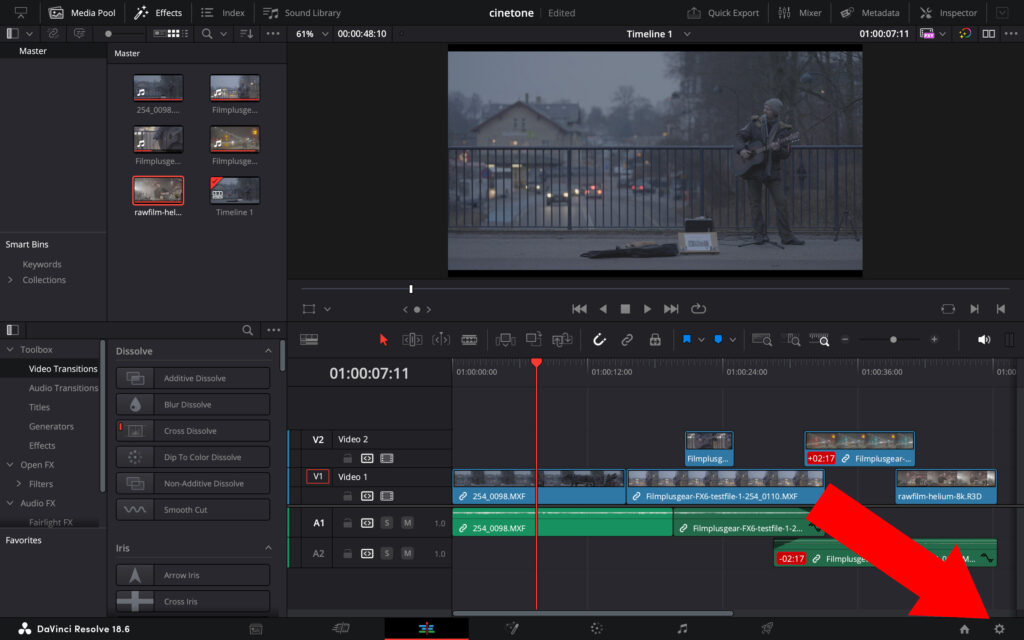
กดไปที่เมนู ⚙️ ตรงมุมขวาล่าง

ในแท็บเมนูฝั่งซ้ายให้เลือก “Color Management” จากนั้นกดที่ปุ่ม “Open LUT Folder”
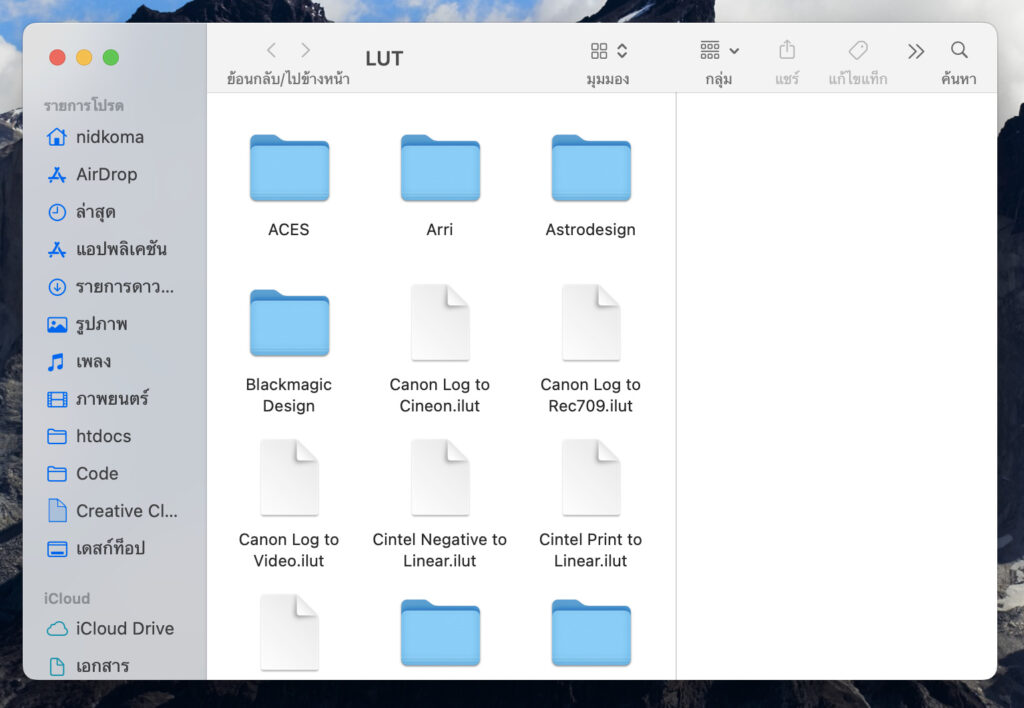
ก็จะเจอกับโฟลเดอร์ที่เอาไว้เก็บไฟล์ LUT ต่างๆ

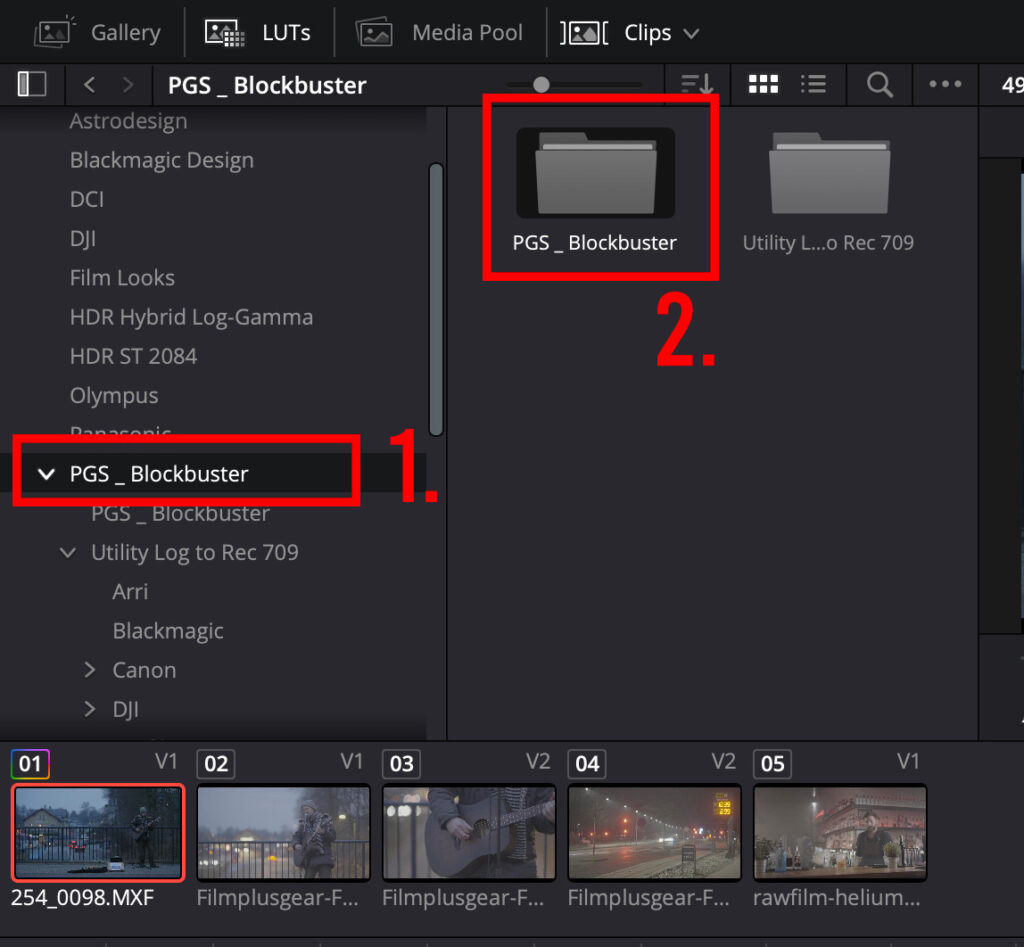
ทำการคัดลอกโฟลเดอร์ PGS_ Blockbuster ไปที่โฟล์เดอร์ไฟล์ LUT
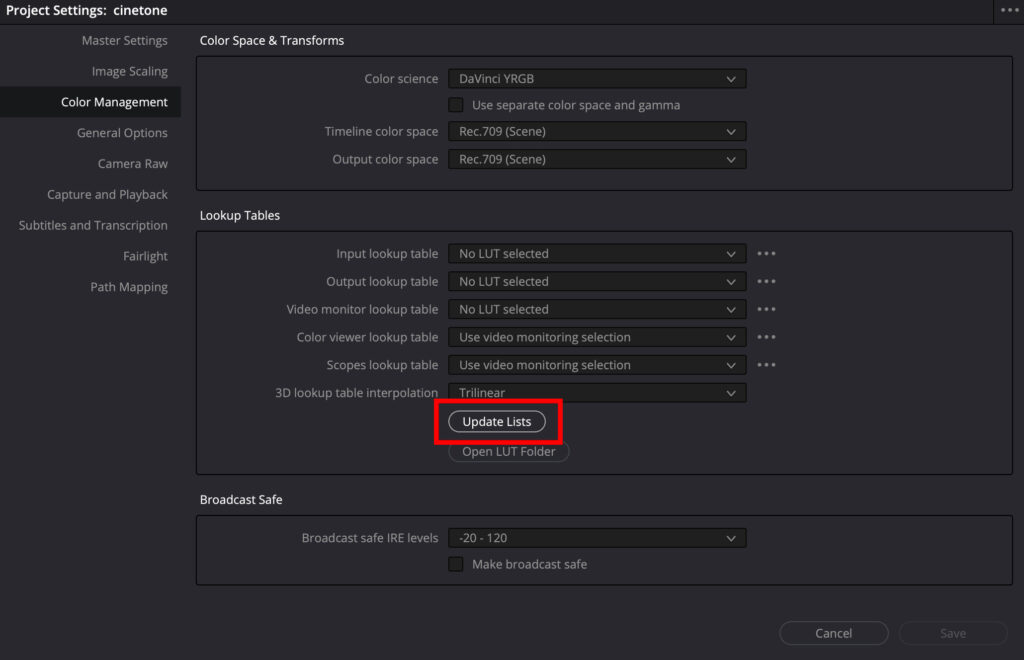
กดปุ่ม “Update Lists” จากนั้นกดปุ่ม “Save” ที่มุมล่างขวา
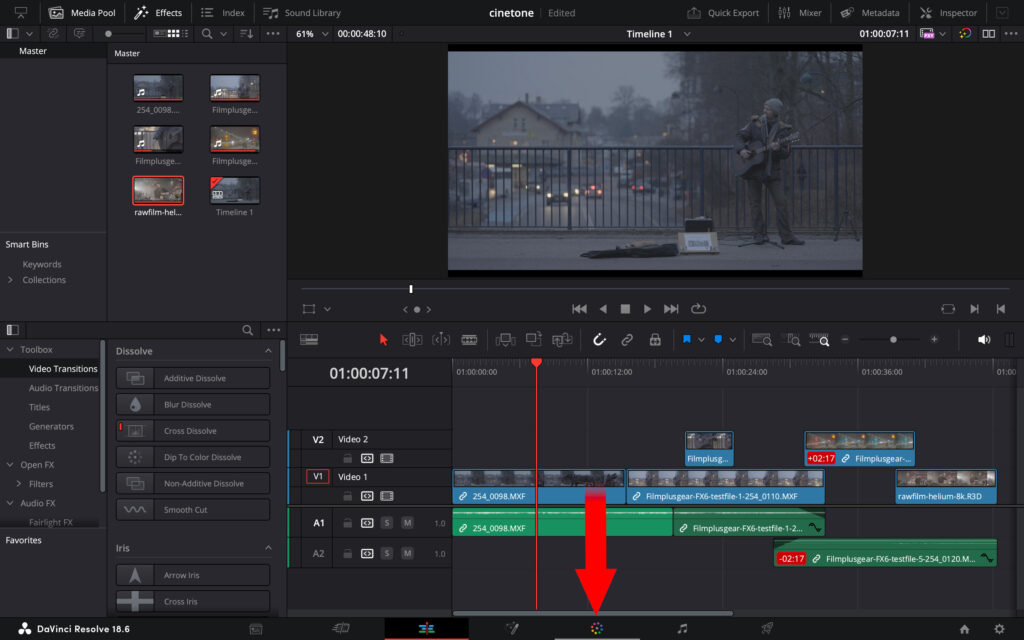
กดเข้าโหมดเกรดสี (Color Grading)
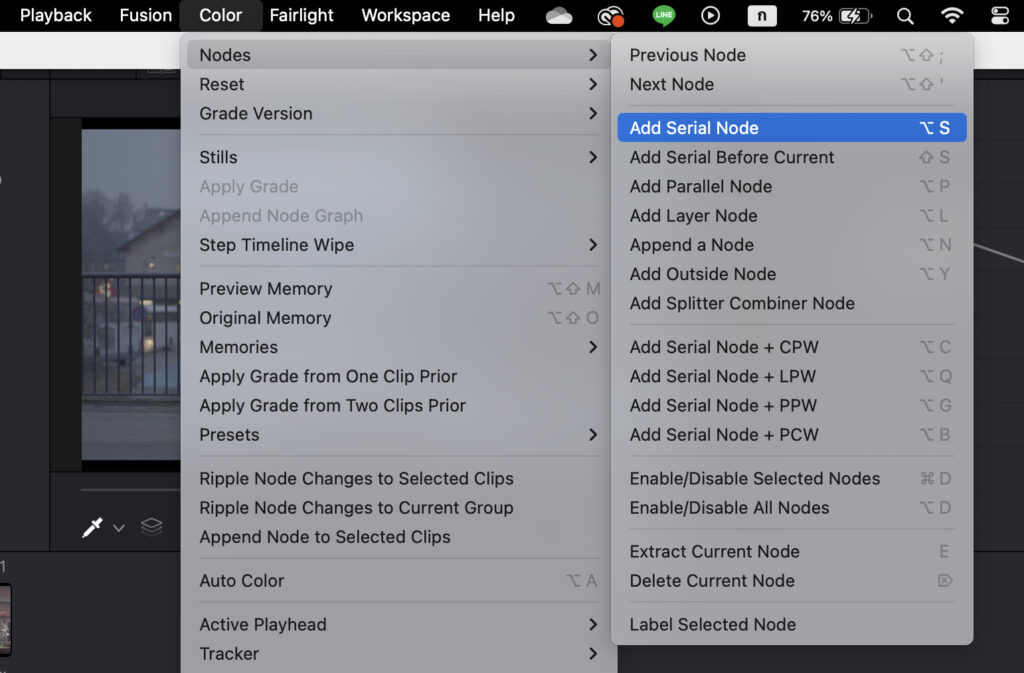
ให้ไปที่เมนู Color > Nodes > Add Serial Node
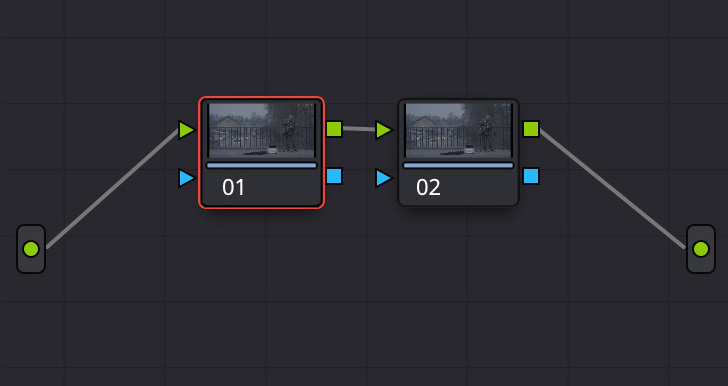
จะได้ Node เพิ่มมาอีกอัน ให้กดเลือกอันที่ 01
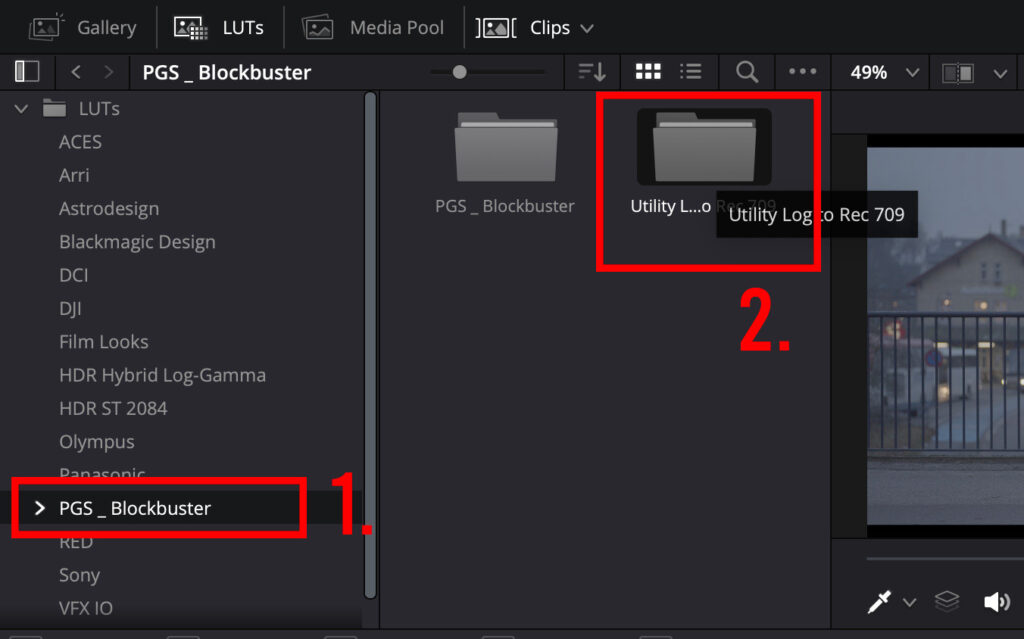
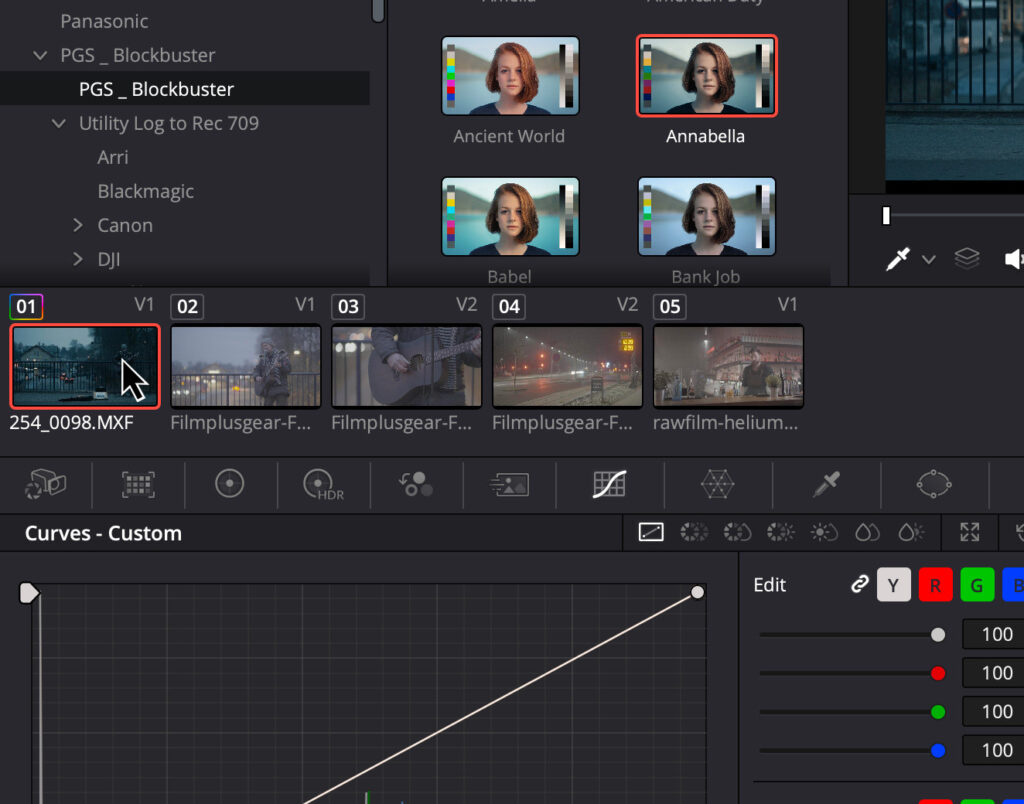
เลือนหา PGS_ Blockbuster ในแท็บเมนูฝั่งซ้าย จากนั้นกดเข้าไปที่ โฟลเดอร์ Utility Log to Rec 709
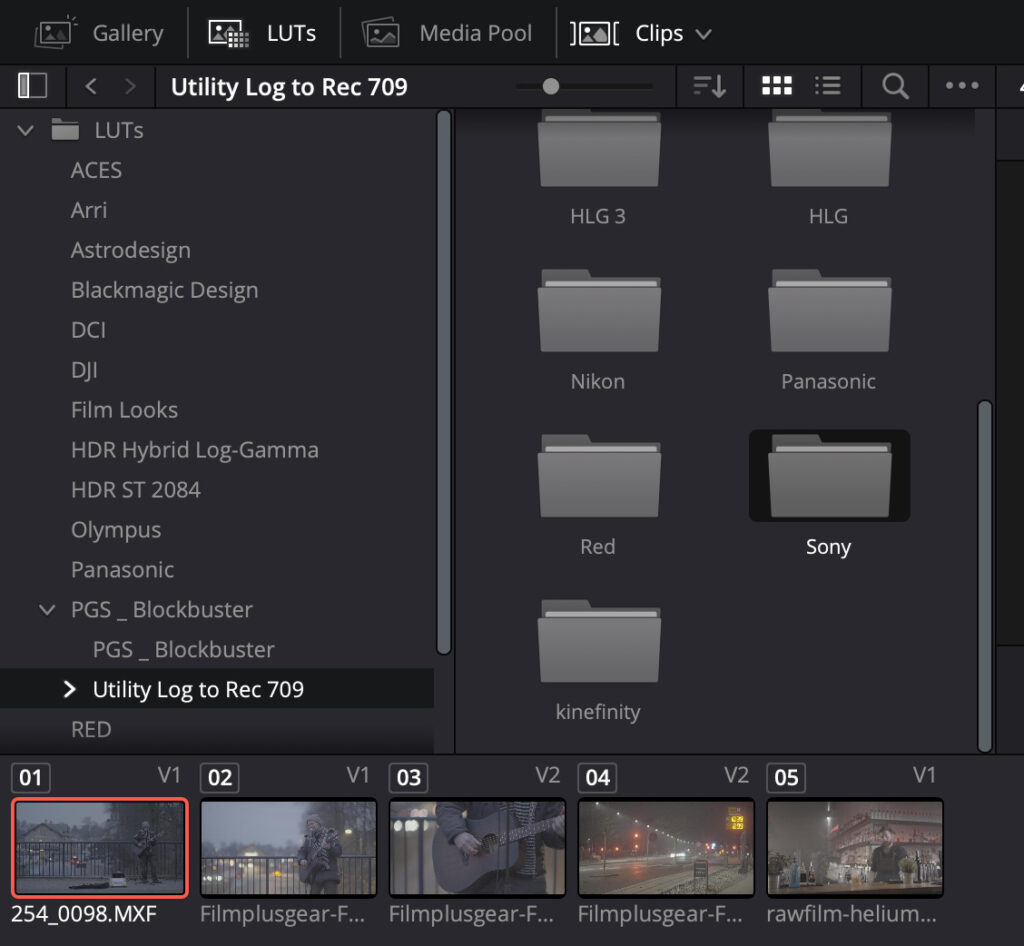
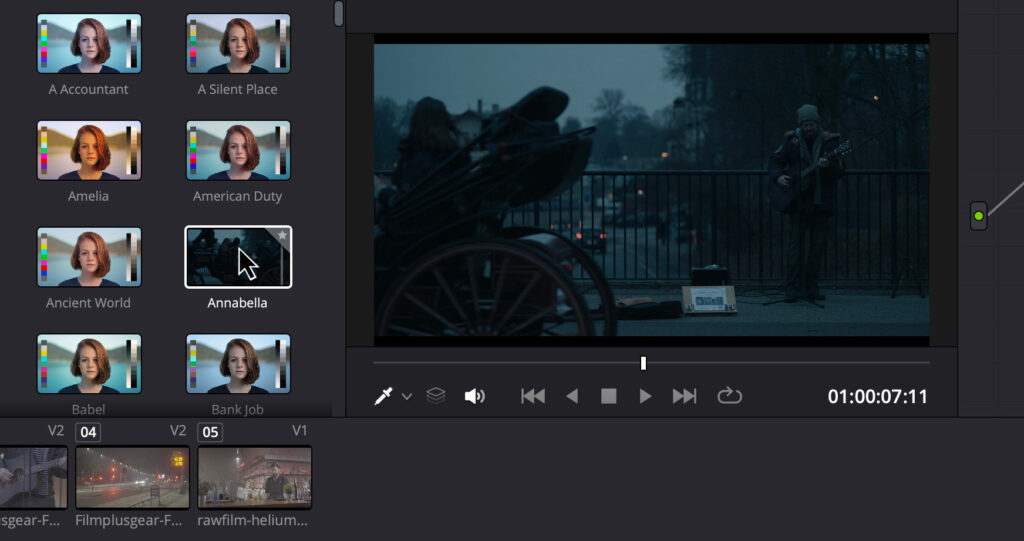
เลื่อนหาโฟล์เดอร์ชื่อกล้องที่เราใช้ (ในตัวอย่างถ่ายจากกล้อง Sony FX6) หากไม่มีชื่อกล้องให้ลองเลือกที่ใกล้เคียง จากนั้นก็กดเข้าไป
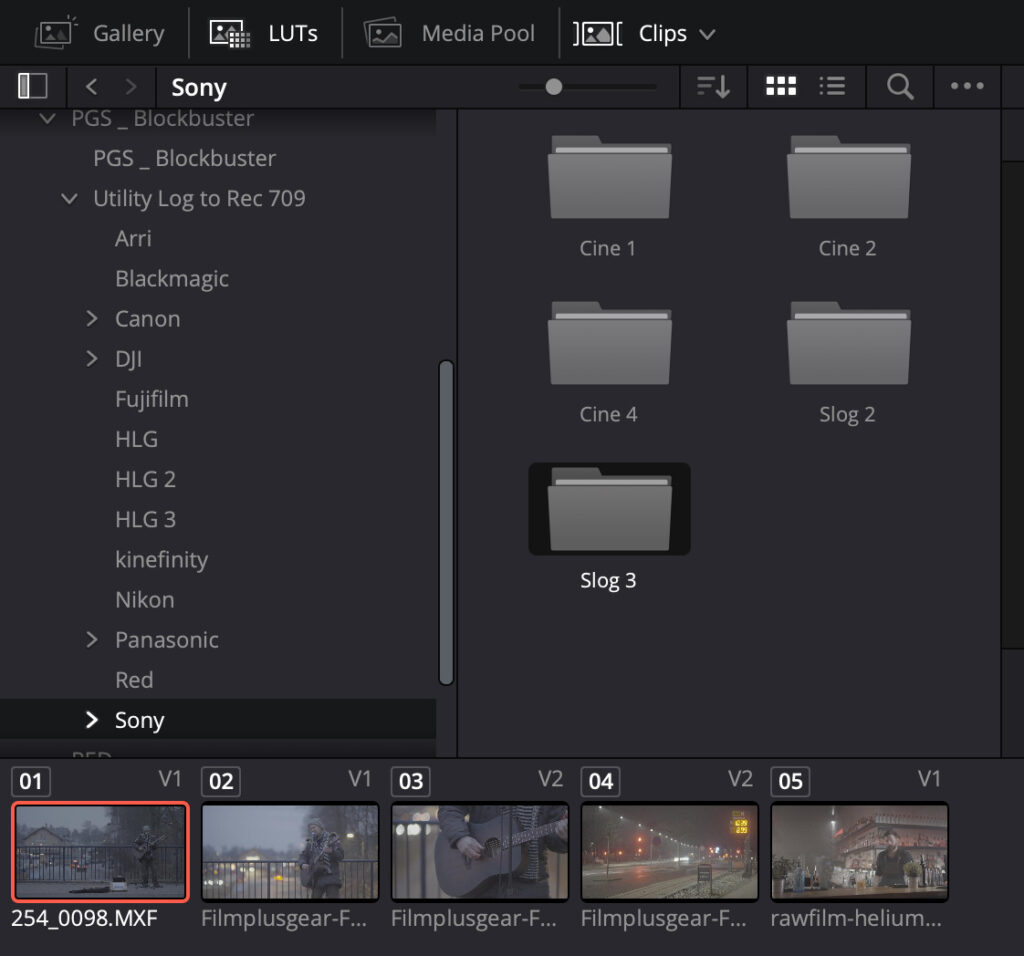
เลือกโฟลเดอร์ตามโหมดการถ่าย ในตัวอย่างถ่ายแบบ Slog3 หากไม่รู้ว่าถ่ายโหมดไหนมาให้ลองเลือกอันไหนก่อนก็ได้ ถ้าไม่ถูกใจค่อยมาเลือกใหม่
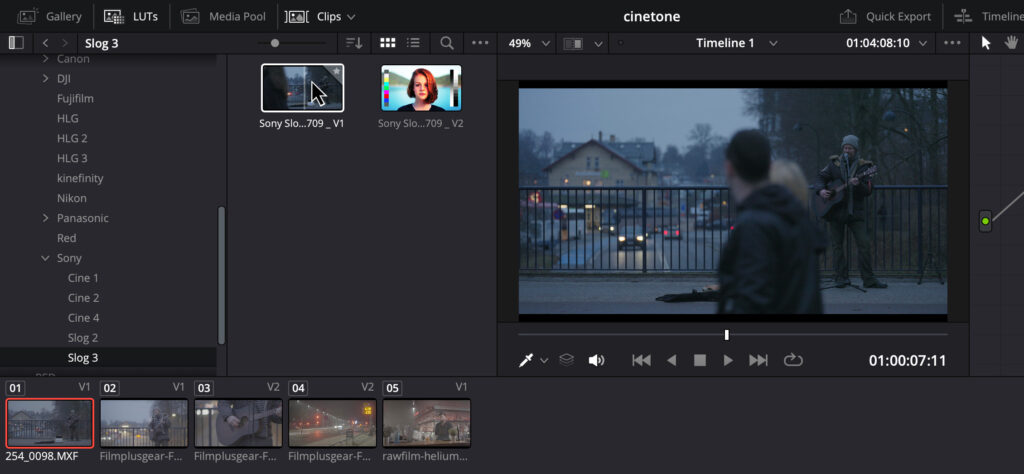
ลองเอาเมาส์เลื่อนไปวางที่ LUT ก่อน เพื่อดูว่าเราชอบอันไหน
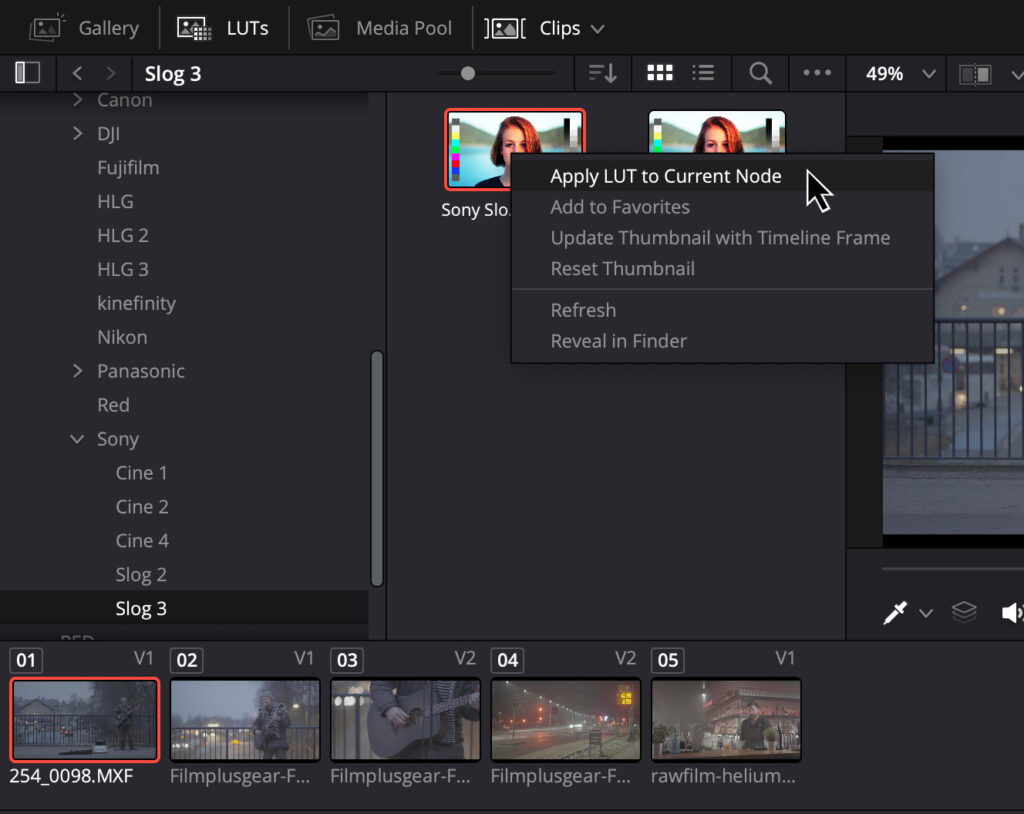
หากได้อันที่ชอบแล้วให้คลิกขวาที่ LUT แล้วเลือก “Apply LUT to Current Node”
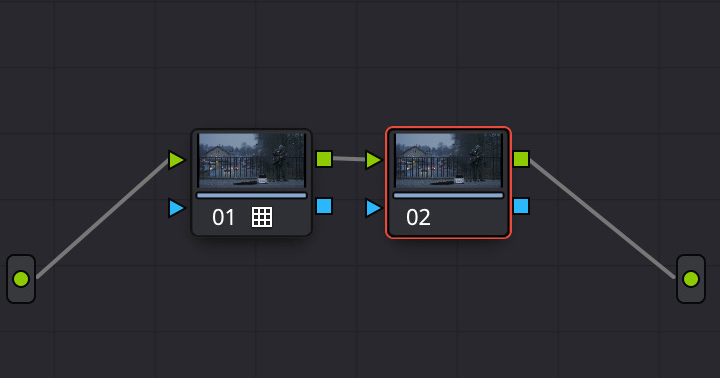
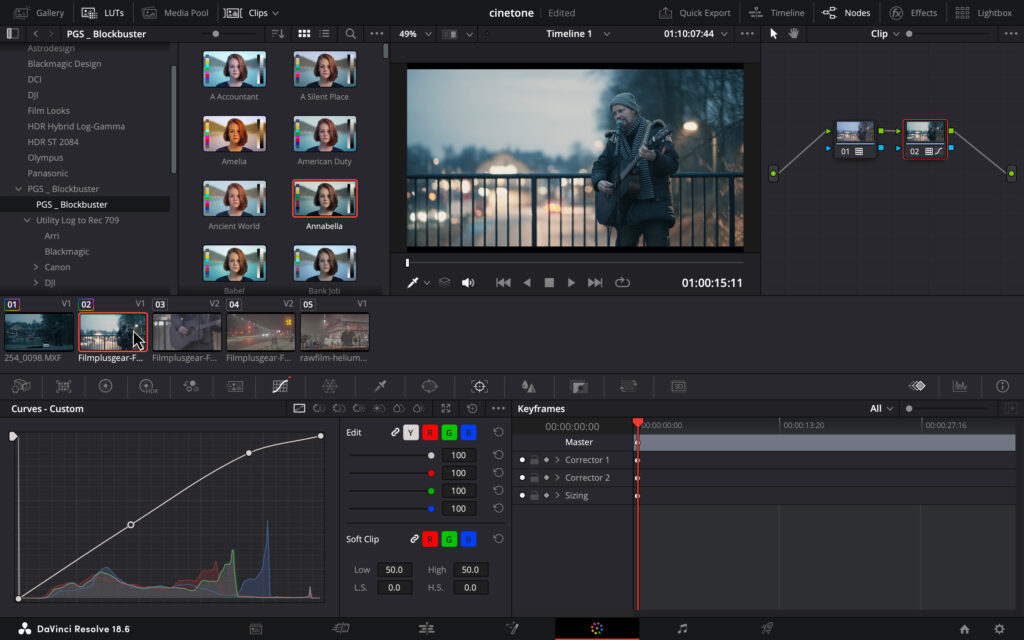
จากนั้นให้มาเลือก Node 02
กลับมาที่แท็บเมนูด้านซ้าย ให้เลือกไปที่โฟลเดอร์ PGS_ Blockbuster
ลองเอาเมาส์วางที่ LUT เพื่อดูโทนที่ชอบก่อนได้
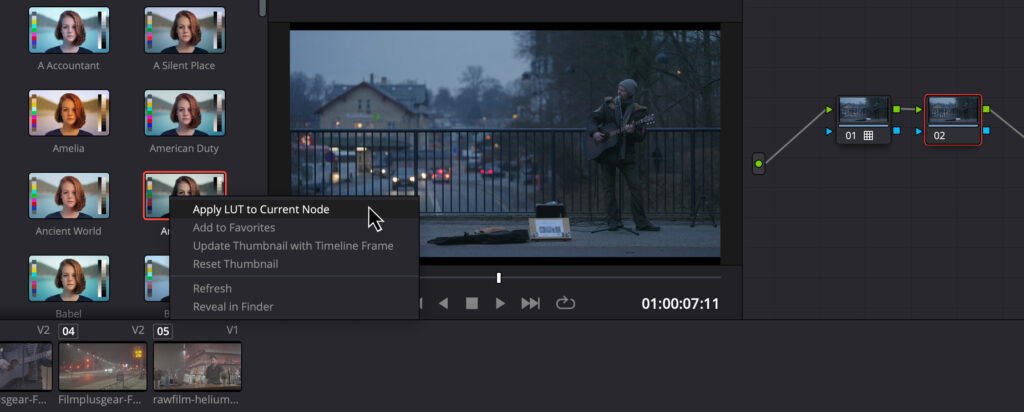
หากได้อันที่ชอบแล้วให้คลิกขวาที่ LUT แล้วเลือก “Apply LUT to Current Node”
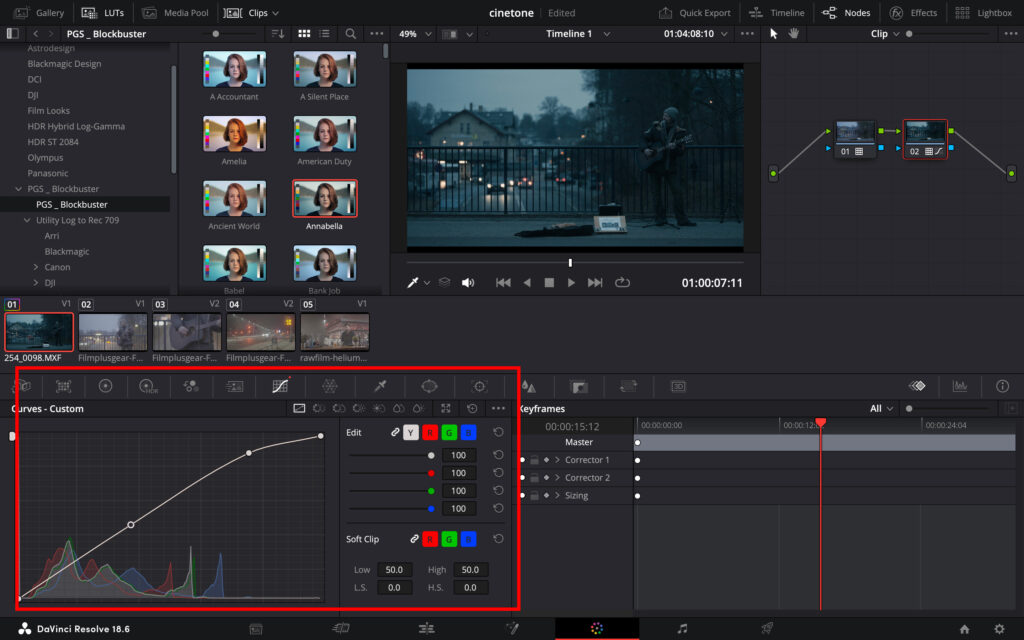
เราสามารถปรับสีเพิ่มเติมได้หาก LUT ที่เราใช้สีสันยังไม่ค่อยโดนใจ เพราะว่าไฟล์วิดีโอของเราถ่ายมาสภาพแสงต่างกัน ใช้ LUT ตัวเดียวกันแต่สีก็ออกมาไม่เหมือนกัน ดังนั้นเราอาจจะต้องมาปรับเพิ่มเติมในตอนหลัง
วิธีคัดลอกโทนสีไปใช้ในไฟล์วิดีโออื่นๆ
หากไฟล์วิดีโออันแรกเราปรับสีจนเป็นที่น่าพอใจแล้ว ทีนี้ไฟล์ถัดไปก็ต้องใช้โทนสีเดียวกันแต่ไม่อยากมานั่งปรับใหม่ สามารถคัดลอกโทนสีได้ง่ายๆ
เลือกไฟล์ที่เราต้องการคัดลอกโทน จากนั้นกดปุ่ม
command + C สำหรับ MacOS
Ctrl + C สำหรับ Windows
เลือกไฟล์วิดีโอที่เราต้องการวางโทนที่คัดลอก จากนั้นกดปุ่ม
command + V สำหรับ MacOS
Ctrl + V สำหรับ Windows
เพียงเท่านี้เราก็จะได้โทนสีวิดีโอระดับภาพยนตร์ดังแล้ว ก็ลองเอาไปปรับใช้ในงานได้นะครับ ข้อสำคัญคือไม่ใช่ทุกไฟล์ที่ทำออกมาแล้วสีสวย เพราะขึ้นอยู่กับสภาพแสง รวมถึงคุณภาพของกล้องที่ใช้ถ่าย
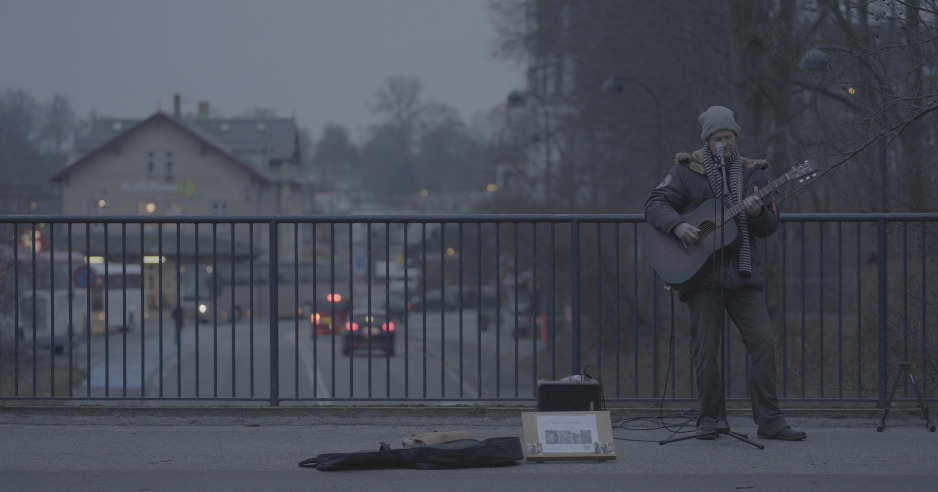
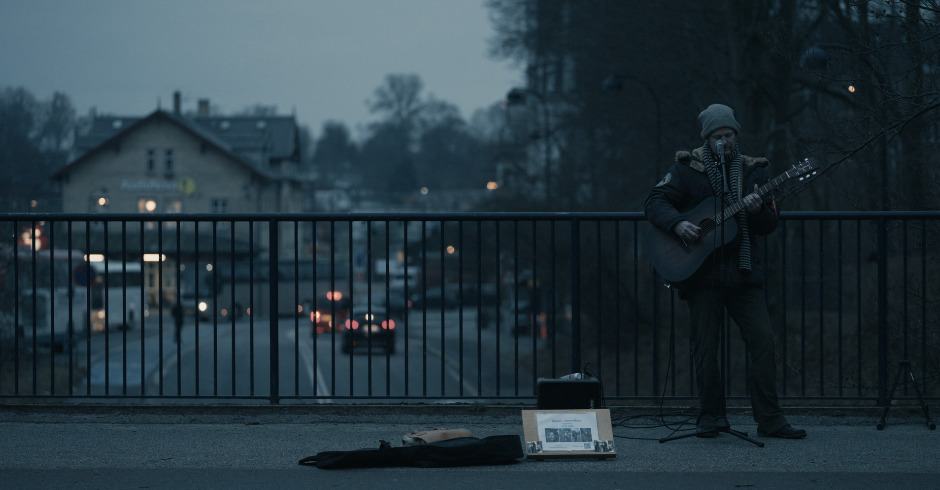
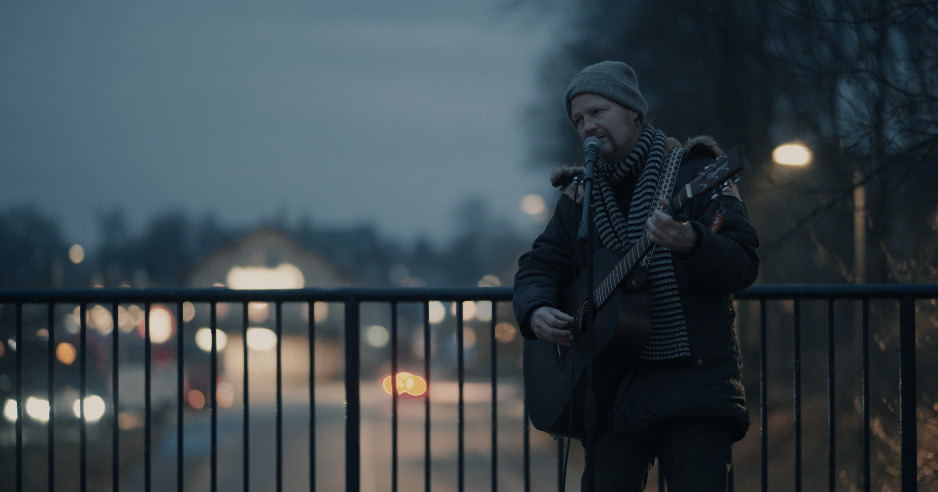
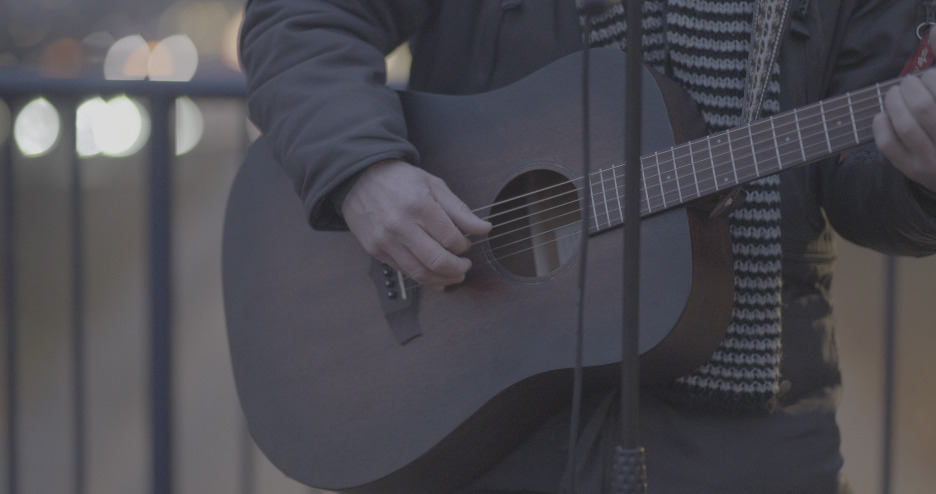
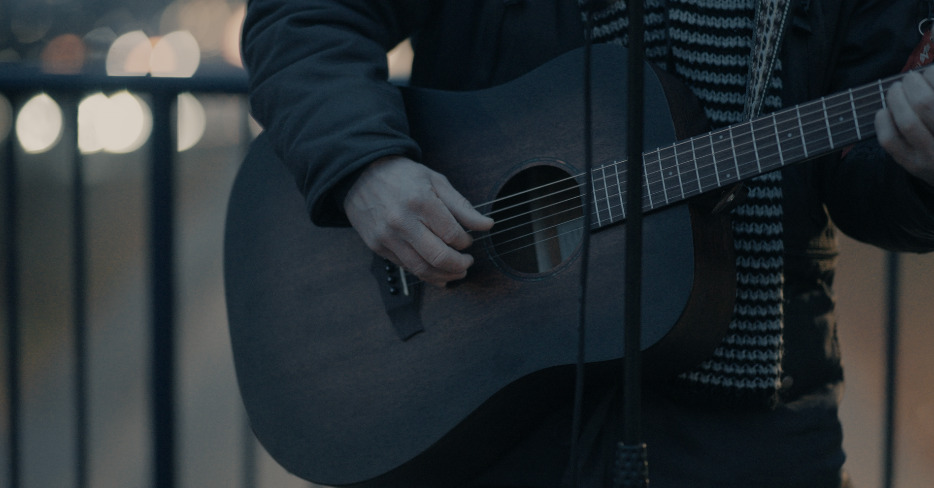
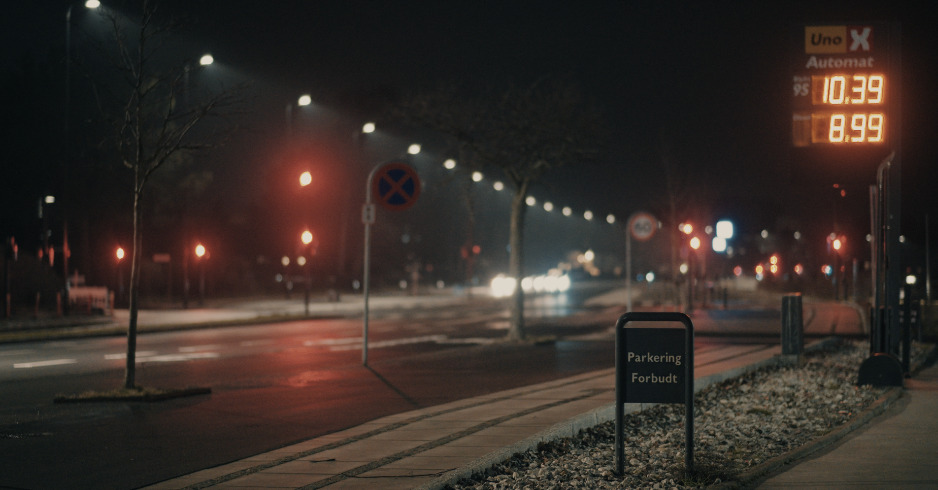
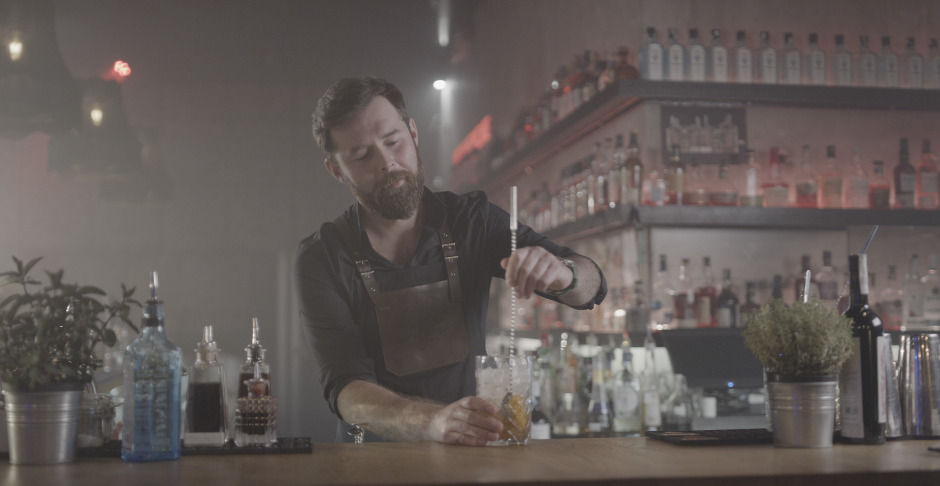
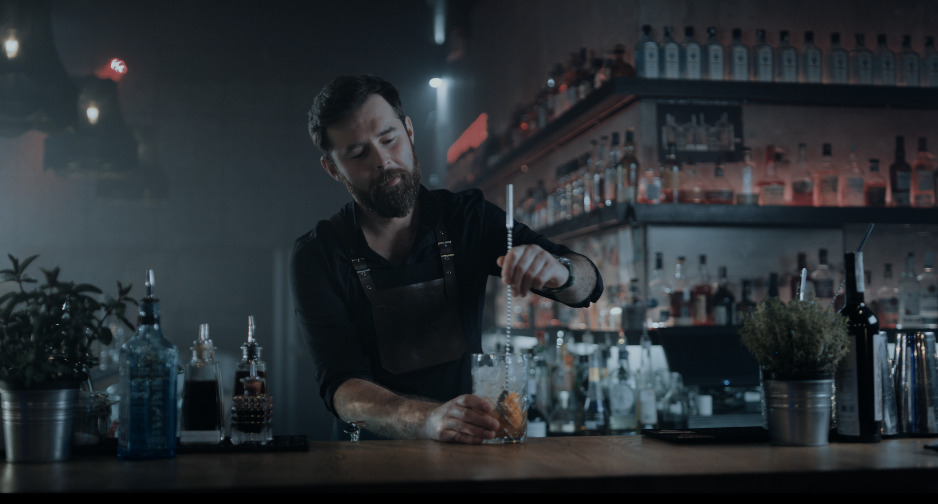
ตัวอย่างก่อนใช้งาน และหลังใช้งาน LUT Blockbuster


โหลดไฟล์ได้จากปุ่มด่านล้าง
ดาวน์โหลด LUT ฟรีเหล่านี้และสร้างวิดีโอที่น่าทึ่งได้อย่างง่ายดายและมีประสิทธิภาพ ใช้งานได้กับฟุตเทจทุกประเภท ไม่ว่าจะเป็นคลิปในที่แสงน้อยหรือวิดีโอในเวลากลางวัน ฟิลเตอร์เหล่านี้ช่วยให้คุณดึงดูดความสนใจของผู้ชมและทำให้พวกเขาตื่นตาตื่นใจด้วยสีสันที่กลมกลืนและเหมือนภาพยนตร์ Cinematic